If your oven door won’t close, it can throw a spanner into your cooking plans. Your oven will struggle to maintain its temperatures, and your dishes will not cook through evenly.
More than that, oven doors that don’t shut properly compromise the efficiency and safety of your oven.
Here, we explore the common causes behind an oven door that won’t close as it should. From issues with door seals and hinges to potential obstructions and misalignments, understanding the root causes is the first step toward finding effective solutions.
So, join us as we go through nine troubleshooting techniques and practical tips for resolving the issue.
How Do You Fix an Oven Door That Won’t Close?
If your oven door won’t close properly, there are a few potential reasons for the issue. Regardless of whether you have a slide-away door oven or an oven with a French or pull-down door, here are the steps you can take to troubleshoot and fix the problem:
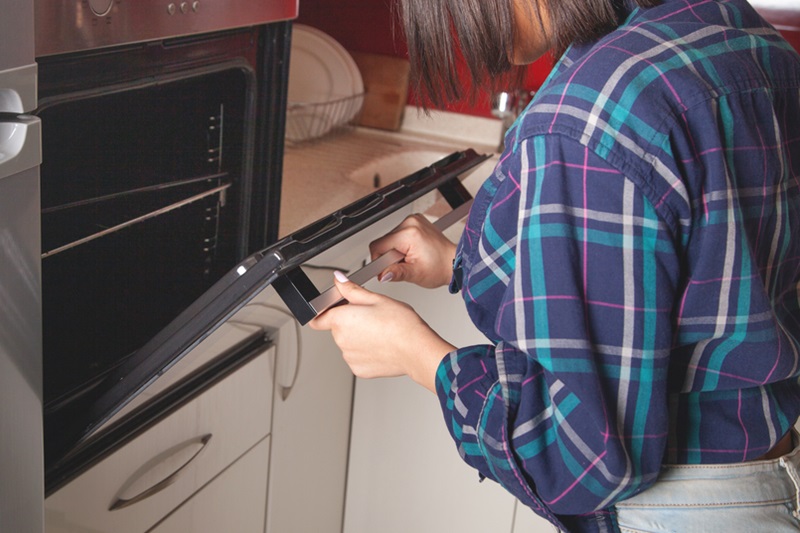
1. Inspect the door seal
All oven doors have a rubber seal – known as a gasket – around the edge. The rubber seal helps to create an airtight seal between the oven door and the oven cavity.
This is crucial for maintaining an accurate temperature inside the oven, resulting in even cooking, more energy-efficient operation, and lower running costs.
If your oven door won’t close, there is a chance that the rubber gasket around the oven door may be damaged or worn out.
Inspect the seal for any tears, deformities, or signs of wear. If the seal is compromised, it may need to be replaced.
Replacing the gasket on an oven door is a relatively straightforward process. Here’s a general guide:
- Turn off and open the oven: Ensure that the oven is turned off and has cooled down completely. Then, fully open the oven door to access the gasket. Depending on the make and model, you may need to remove the oven door to access the rubber seal fully.
- Remove the gasket: Locate the screws securing the old gasket and use a screwdriver to remove them. It may also be held in place by additional clips or other fasteners that can be removed using pliers. Carefully peel off the old gasket from the edge of the oven door.
- Clean the gasket area: Clean the area where the old gasket was attached using soap and water or a mild cleaner. This removes any residue that could interfere with the proper closure of your oven door.
- Install the new seal: Unbox the new oven door gasket. Align it with the door opening and press it into place. Secure the new gasket using the clips or fasteners. If your gasket doesn’t come with new clips or fasteners, reuse the ones you removed earlier.
- Check the gasket: Ensure that the gasket is securely attached around the entire perimeter of the oven door. Then, close the oven door and check for a proper seal. The gasket should create a tight seal around the door to prevent heat loss.
2. Clean the door and hinges
Sometimes, dirt, grease, or debris can accumulate around the door and hinges, preventing it from closing correctly. Therefore, try cleaning the area thoroughly to ensure no obstructions and see if your oven door will shut again. If preferred, you can also pay for professional oven cleaning.
Assuming you’re cleaning the oven yourself, below is the cleaning process we recommend you follow. Remember to turn the oven off and allow it to cool down before you begin:
- Sweep or vacuum the area around the oven to remove any loose debris, crumbs, or dirt.
- Mix warm water and a small amount of washing-up liquid or a mild kitchen cleaner in a bowl.
- Dampen a soft sponge or cloth with the cleaning solution and wipe down the exterior of the oven door. Pay attention to areas with grease splatters, fingerprints, or other stains.
- Gently clean the rubber gasket around the oven door. Use a soft cloth or an old toothbrush to remove any dirt or debris, being careful not to damage the gasket.
- Use paper towels to dry all surfaces thoroughly, then test to see if the oven door closes.
3. Check for obstructions
If your oven door won’t close, there could be various obstructions causing the problem.
Therefore, look for any objects or debris that may be preventing the door from closing and remove them. You must ensure nothing is blocking either the hinges or the door itself.
Here are some common obstructions to check for:
- Cookware or oven racks: Check the oven racks for cookware that might be obstructing the door. Pans, baking trays, or other items can protrude and prevent the door from closing.
- Obstruction in the door hinges: Inspect the hinges on the oven door for any debris, food particles, or other obstructions. Clean the hinges carefully to ensure they can move freely.
- Buildup of food or grease: Food or grease buildup around the edges of the oven door or on the gasket can interfere with proper closure. Clean these areas thoroughly.
- Misaligned rubber gasket: If the rubber gasket around the oven door is misaligned, damaged, or has food debris stuck to it, it can prevent the door from closing properly.
- Foreign objects in the door latch: Check the door latch for any foreign objects hindering its operation. Clean the latch area to ensure it can engage properly.
4. Adjust the door hinges
The hinges on your oven may be misaligned, causing the door to close at an awkward angle and not fit properly within the frame.
Close the oven door and observe how it aligns with the oven cavity. Adjustments may be necessary if the door is not closing evenly or is misaligned.
The specific process for adjusting door hinges will vary depending on your oven model, so it’s crucial to consult your user manual for precise instructions. However, here’s a general guide that may help:
- Locate the hinge adjustment screws: Open the oven door to access the hinges and locate the hinge adjustment screws on each side. These screws are usually found on the hinge itself or the oven frame.
- Loosen the adjustment screws: Use a screwdriver (usually a Phillips-head type) to loosen the hinge adjustment screws by turning the screws anti-clockwise. You may need to loosen both the upper and lower screws on each hinge.
- Adjust the door: With the screws loosened, make adjustments to the door position. If the door needs to move up, lift it slightly, or if it needs to move down, lower it. If it needs to tilt to one side, tilt it accordingly. This is often easier with the help of a friend or family member.
- Tighten the adjustment screws: Once you’ve made the necessary adjustments, tighten the hinge adjustment screws by turning them clockwise and secure the door in its new place. Ensure the door remains in the desired position as you tighten the bolts.
- Test the door closure: Open and close the oven door to check if it now closes evenly and aligns properly with the oven cavity. If needed, make further adjustments by repeating steps two to four until your oven door closes correctly.
5. Inspect the latch
All oven doors have a latch mechanism designed to secure the door during operation, especially when the oven is in use and generating high temperatures.
The latch ensures the oven door is tightly closed, preventing heat from escaping and enhancing the appliance’s safety.
If your oven door won’t shut, the latch might be broken. Check the latch mechanism to ensure it is functioning correctly and replace it if needed by following these steps:
Note: Before attempting any repairs, ensure that the oven is turned off and has cooled down completely to avoid burns or injuries.
- Order a replacement latch: Identify the model number of your oven and order a replacement door latch from the manufacturer or a reliable supplier. You must make sure the replacement latch is compatible with your oven model.
- Remove the old latch: Locate the screws holding the latch in place and remove them, then carefully detach the latch from the door. Some latches may have electrical wires connected for features like self-cleaning in pyrolytic ovens. If so, carefully disconnect them, too.
- Install the new latch: If your replacement latch comes with instructions, follow those for installation. Generally, you’ll need to attach the new door latch to the oven door using the screws you removed earlier and reconnect any wires if your latch is electrically operated.
- Test the door latch: Close the oven door and test the new latch to ensure it engages properly. If there are any issues, double-check the installation and make adjustments if necessary. If you’re still experiencing problems, you might need to adjust the hinges.
6. Tighten screws and bolts
If your oven door isn’t closing, check all screws and bolts on the oven door are tight. Loose screws can contribute to misalignment and prevent the door from shutting properly. Fortunately, a quick tightening with a screwdriver should solve the problem.
Here are the key screws and bolts involved in the opening and closing of your oven door that you should check:
- Hinge screws: Oven doors are usually attached to the oven body with hinges. These hinges have screws that secure them to the oven frame to hold the door in place.
- Hinge adjustment screws: Some oven doors have hinge adjustment screws that allow you to adjust the position of the door. Check these are screwed in tightly.
- Latch screws: The door latch mechanism is often secured with screws. If these screws are loose, it can affect the proper engagement of the latch.
- Frame bolts: The oven frame may have bolts that secure it to the cabinet or kitchen structure. If these bolts are loose, it can cause the oven to shift, affecting door alignment.
- Handle screws: The handle of the oven door is often attached with screws. If these screws are loose, it may affect the overall stability of the door.
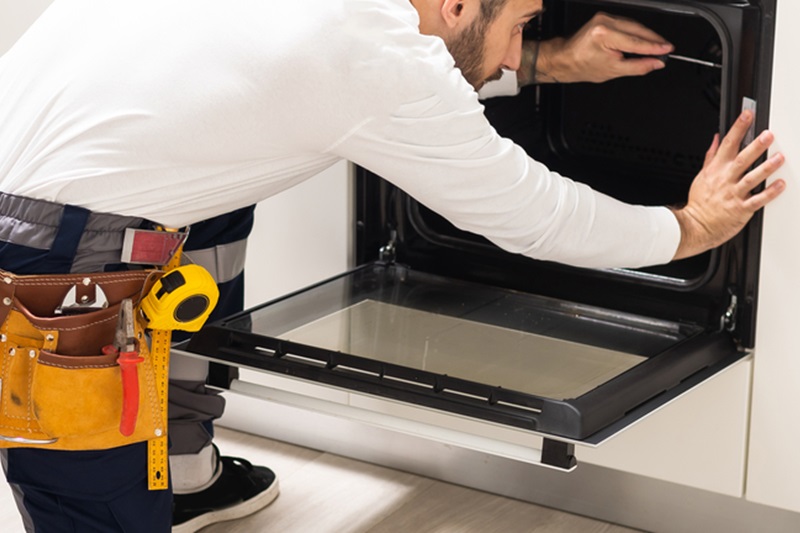
7. Replace damaged springs or hinges
If you find any damaged hinges or springs, you may need to replace these parts. Consult your oven user manual or contact the manufacturer for information on obtaining replacement parts compatible with your oven, then follow these steps:
Note: Before attempting any repairs, make sure you’ve turned the oven off and given it time to cool down. Consider seeking professional assistance if you’re unsure or uncomfortable with the process.
- Fully open the oven door to access the hinges and springs.
- Identify the broken springs and hinges. Hinges are typically attached to the oven frame, while springs are often connected to the door or hinges.
- Use a screwdriver to remove any screws or bolts securing the broken hinges or springs.
- Attach the replacement hinges and springs, following the same steps in reverse removal order. Refer to the user manual for your oven if at all unsure.
- Ensure that all screws are tightened securely, using a screwdriver or pliers as needed.
- Open and close the oven door to test the functionality of the new springs and hinges. The door should move smoothly and close securely.
8. Replace the oven door
In some cases, you will need to replace the entire oven door with a new one. Identify the model number of your oven and order a replacement door from the manufacturer.
You can then unscrew the old oven door and attach the new one in its place.
Before replacing the oven door, considering whether you’re better off buying a whole new oven is worthwhile.
Here are some factors to think about:
- Cost of replacement parts: Compare the cost of the replacement door and any necessary parts (hinges, springs, etc.) to the cost of a new oven. If the replacement parts are expensive, investing in a new appliance might make more sense.
- Age of the oven: Replacing the door may be a cost-effective option if your oven is relatively new and in good overall condition. However, ovens don’t last forever. If the oven is old and experiencing multiple issues, it might be better to invest in a new model.
- Extent of damage: Consider the extent of the damage to the oven door. If the damage is limited to the door itself and the hinges, and replacement parts are readily available, it may be worth replacing the door.
9. Seek professional help
If your oven door still won’t close after following these troubleshooting steps, it’s best to consult with a qualified appliance repair technician.
You should also reach out to a professional repair company if you’re uncomfortable trying to fix the problem yourself.
Besides, professional repairs are more likely to result in a lasting solution to extend the lifespan of your oven.
When contacting a professional, provide them with information about the make and model of your oven, as well as a clear description of the issue.
This will help them come prepared with the necessary tools and replacement parts if needed.

Hannah is a freelance content writer and self-proclaimed foodie. When Hannah isn’t sitting tapping at her laptop, you’ll probably find her in the kitchen. As an ex-chalet host, she’s used to cooking four-course meals for 10+ people and loves feeding friends and family whenever possible.


